A practical guide to creating learning videos: part 4

Practical guidesIn part 1 of this series we examined the potential for video as a learning tool. In part 2, we moved on to look at the steps involved in pre-production. Part 3 took us to the shoot. And so to the final stage in the creation of a learning video – post-production. At this stage we collect together all the material that we shot at the production stage, select what we want to keep and what we can safely leave ‘on the cutting room floor’, edit all this together, add titles, graphics, music and effects, export as a finished product and distribute to our audience. This may all seem very technical but modern software has transformed much of this to a process of drag and drop, copy and paste. So let’s get started.

Editing

Editing is not obligatory. There’s nothing to stop you shooting something straightforward like an interview to camera and then uploading the results, without modification, to a site such as YouTube. But even the simplest videos will usually benefit from a little editing, even if just to trim the start and finish points and add a caption to inform the viewer who it is that’s speaking. This sort of editing is a doddle. And while you’re at it, why not add a title, perhaps with a little music behind? Yes, before you know it, you’re putting together videos that, while not quite professional in quality, don’t annoy the viewer with their amateurishness.
The aim of editing is to be invisible. In other words, you want the viewer to be able to concentrate on the content of your video without becoming aware of any of the mechanics of production and post-production. If you’ve done a good job, no-one will say what a good job you’ve done of putting it all together – they’ll just thank you for a great piece of content.

Editing software
Editing software works much the same way whether its a free program like iMovie (left) or a full professional package like Adobe Premiere Pro (right)

Video editing software comes at three levels of sophistication: (1) the free programs that come with your computer, such as MovieMaker (Windows) or iMovie (Mac), (2) budget versions of the top-end tools, such as Adobe Premiere Elements (under $250) and (3) the top-end tools themselves, Final Cut Pro (Mac only), Adobe Premiere Pro and Sony Vegas Video Pro. Although you wouldn’t think so from the price tags, pretty well all video editing software is roughly the same. The free software will get you a long way and may be more than enough for all your future needs. If you love playing with software, you’ll want more features and the mid-level tools will provide you with plenty of toys. The top-end tools are for pros and if you’re one of them you won’t be reading this guide.
Your basic editing tasks are as follows:

  1. Import your clips from your camera.
  2. Choose the clips you want to use and drag and drop them onto the timeline.
  3. Where appropriate, split clips up into smaller clips.
  4. Trim the start and end point of each clip.
  5. Arrange the clips into sequence.
  6. A simple cut between clips is usually best, but in some cases you may want to create a transition, perhaps some form of cross-fade. If you want your editing to be invisible, then avoid flashy transitions.
  7. Overlay titles and captions where appropriate.
  8. You may want to cut away to photographic stills or graphics. By contrast with your video clips, these could look overly static, so consider adding movement through some subtle panning or zooming.
  9. To help create the right mood, consider adding a music track, particularly in those sections where there is no speech.

With a little practice, these tasks will be simple enough to perform. If you want more help, there are plenty of great how-to videos on YouTube – which only goes to emphasise what a great learning tool video can be. Look for inspiration on YouTube and on the TV. In particular, focus in on those programmes in which the editing is almost invisible and try to identify the techniques that were used to achieve that result.

Sharing

Now your video is ready to go, you’ll want to get it into the right format for your intended audience. You’ll probably want to distribute your video material in one of the following three ways:

  1. On a DVD: In this case your editing software will guide you through the steps needed to write a single disc or to prepare a disc image for duplication.
  2. As an element within an e-learning module: The key here is to find out what formats and resolutions are supported by your particular authoring tool. Obviously you’ll want your video to be played back in the largest video window and with the best audio quality possible, but check out whether your this will be realistic given the bandwidth available to your audience.
  3. Through a video streaming service such as YouTube: We all know how YouTube works and how well it adapts to the available bandwidth and the particular device you are using. You can upload to YouTube in quite a range of formats, but you should probably check out the most appropriate options on the YouTube site first. Your videos do not have to be made public – if you prefer you can restrict access only to those who are provided with the URL. Even so, if you need a completely secure service, YouTube may not be the answer. Check with your IT department or LMS provider to see what other options are available.

Exporting video
Share your video on DVD, as part of an e-learning module or on a video streaming site

Don’t be too put off by the thought of the burden you will be placing on your organisation’s network by making video available online. Chances are your network is capable of supporting hundreds, perhaps even thousands of simultaneous users without undue strain. But do check first. You won’t be popular if business grinds to a halt as scores of employees rush to sample your latest offering.
That concludes this practical guide. Good luck!
This guide is now also available as a PDF download.
Coming next: Creating learning tutorials

A practical guide to creating learning videos: part 3

Practical guidesIn part 1, we looked at the various forms that learning videos can take and the ways they can be used, either as a stand-alone solution or as an element in a blend. In part 2, we moved on to look at pre-production – all those tasks that need to be completed before you press record on the camera. In this instalment, we get to the shoot itself, with some hints and tips for the set ups you’re most likely to encounter when producing learning videos.

The ‘piece to camera’ or PTC

The piece to camera
We’re all familiar with the piece to camera as a technique used in news broadcasts, but in the context of low-budget learning videos, we’re more likely to use this approach to record a response to a question. The following tips will help you to do an effective job:

  • Explain to the subject what you are going to do and what question you would like them to answer.
  • Make a note of the subject’s name and check the spelling with them before you leave.
  • Find an interesting setting, ideally one which will  reflect the context of the topic.
  • Position the camera at the subject’s eye level, ideally on a tripod. Whatever you do, do not look down on the subject.
  • Frame the shot so you don’t leave lots of space above the subject’s head as this will make them look short.
  • Ask the subject to look directly into the lens.
  • Don’t rehearse if you want the subject’s response to sound really natural.
  • If you’re feeling adventurous, add some movement by using an occasional slow zoom in and out.

The interview

The interview is one of the principle video formats and one that has real value for learning. In the ideal world you would shoot an interview with two cameras – one for the interviewer and one for the interviewee – and then choose the shots you would like to go with during the edit. However, this series is about what you can do with very little equipment and very little experience, so let’s see what you can do with a single camera.

Simple interview
Your simplest option is to set up the camera on a tripod and leave it with interviewer and interviewee in shot

If you want to keep it simple, frame your shot to include both the interviewer and interviewee (see above). If at all possible you should use an external mic, which the interviewer can hold.
It’s also possible to simulate a two-camera shoot and this will certainly provide you with a more interesting end result, particularly if the interview is extended. You’ll need to set up at a number of different angles:

  • A shot which shows both the interviewer and interviewee (a ‘two-shot’), to establish the scene and prove that this interview really did happen with both parties present at the same time! Sometimes this is shot over the interviewer’s shoulder (an ‘OTS’).
  • Close-ups of the interviewee listening to the questions (which are being spoken off camera) and then giving their answers.
  • Reverse shots of the interviewer listening intently to the responses (usually called ‘noddies’). These can be useful in covering up any cuts you want to make in the interviewee’s answers.
  • Reverse shots of the interviewer asking the questions. Be clear that, because you have only one camera and mic, these are recorded separately from the interviewee’s answers – you can safely ditch the original questions to which the interviewee responded.
OTS
An over-the-shoulder shot establishes the scene

The presentation

A video recording of a lecture or presentation is an invaluable way to extend the reach beyond the initial face-to-face audience. Your simplest option is to record the presenter and any slides in one mid-shot. The camera will need to be on a tripod for stability. If the presenter is using a mic then your best best is to take a feed from this directly. If not,  you’ll need to provide your own, ideally a radio mic that the presenter can attach to their shirt. Don’t rely on the mic built into your camera as you’ll be too far away from the presenter to get a clear signal.

Presenter with slides
Your simplest option is to shoot the presenter and the slides in one mid-shot, but you'll do well to make the slides clearly visible

If you don’t mind doing a little editing later, then you could mix up the shots …
Four views are better than one
You'll achieve a more interesting result by starting with a wide shot, cutting between a close-up of the presenter and his or her slides, and mixing in some audience shots

A wide ‘establishing’ shot of the meeting room will set the scene. Then cut between a close up of the presenter and his or her slides. Don’t shoot the slides at the time – get a copy of the presentation, save each slide off as an image and then import these directly into the edit. You might also like to get some cut-aways of the audience to provide more visual interest.
Coming up in the thrilling final instalment: post-production

A practical guide to creating learning videos: part 1

Practical guidesVideo is very much the medium of the moment. Not only do we spend many hours each day watching it on our TVs, it has become an integral part of the online experience. An ever-increasing proportion of the population does not only consume video, it creates and shares it with a world-wide internet audience. Whereas once video cameras cost many hundreds, if not tens of thousands of pounds, they are now integrated for no additional cost in computers, stills cameras and mobile phones. And where once video editing could only be carried out by skilled engineers in elaborate editing suites, it can now be accomplished, often with equivalent production values, with free or low cost software on PCs and even mobile devices.

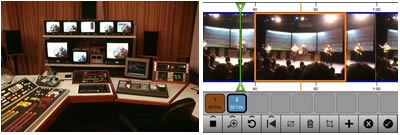
Video production then and now
Gone are the days when, to shoot a video, you depended on the services of a full crew and expensive equipment

Video editing then and now
The same applies to the post-production process. What once required an edit suite can now be accomplished with a smart phone app

In a learning context, video provides a compelling means for conveying content, particularly real-life action and interactions with people. Amazingly, it can also be quicker and easier to produce than slide shows or textual content. Sometimes you just have to point the camera, press record, shoot what you see and then upload to a website. Obviously it won’t always be that easy, but you should start with the attitude that `”I’ll assume I can do it myself, until proven otherwise.”

Media elements

In its purest form, a video is a recording, in moving pictures and sound, of real-life action as captured by a video camera. In actual practice video goes way beyond live action, and is capable of integrating just about every other media element, including still images, text, 2D and 3D animation. At the heart of video, however, will always be moving images of some form and an audio accompaniment, whether ambient sound, voice, music or some combination.

Interactive capability

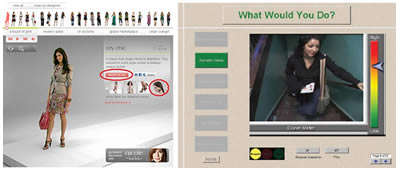
As a general rule, video is not interactive, other than in an exploratory or navigational sense. And for the purposes of this Practical Guide we will be assuming no interactivity. Having said that, it is possible to build interactivity into video, whether that’s on a DVD, a digital TV system or online; it’s also possible to incorporate video material into what are essentially interactive media, such as scenarios and tutorials.

Interactive video
Although not the focus of this guide, video can be used interactively using DVD, digital TV or online. It can also be used as an ingredient in an interactive scenario.

Applications

In its purely linear form, video can be useful for the simple exposition of learning content, such as lectures, documentaries, panel discussions and interviews. It can also function within a more learner-centred context, as  a means for providing how-to information on demand, a facility that has been demonstrated with enormous success on YouTube.
As mentioned above, video also has a role to play within the more structured strategies of instruction and guided discovery, as a component within, say, interactive tutorials and scenarios. It is ideal for setting the scene for a case study or demonstrating a skill. It can also be effectively used as a catalyst for discussion in a forum or in a classroom.
Video is a rich medium in every sense. It is highly engaging and can portray real actions, behaviours and events more faithfully than any other medium. However, this comes at a price. Video is also data rich, and consumes vast amounts of bandwidth. On a CD or DVD this causes no problems, but your IT department will certainly want to know if you are going to be distributing video on a large scale over your company network.

So how do I get started?

Enough of the theory. You’re probably keen to get started. You’ll have to wait a week or two but in the subsequent parts of this Practical Guide, we’ll be looking at the absolute basics of:

  • pre-production: planning, scripting and choosing your camera
  • production: shooting a skills demonstration, a piece to camera, an interview, a lecture/presentation, an acted sequence, an animation – and when to admit defeat and bring in the experts
  • post-production: editing; adding titles, music and graphics; exporting / sharing

Coming in part 2: pre-production
 

The elements of online communication 5: video

Sixth and last posting in a series describing the use of various elements in online communication.


And so we move on to the final stop on our tour of the elements that make up our online communications. The subject of this final posting is video. What contribution can video make? In which situations is it less effective? How is video best delivered online?
What video is good for
Video excels at depicting real-life events. So, assuming that a particular real-life event is of interest, then if it moves and you can point a camera at it, video really is your medium of choice. As another real bonus, it’s easy to record audio at the same time in perfect synch, meaning video is really two media elements packaged as one.
Because the visual and audio content of a video is constantly changing, it attracts and maintains attention. Just think how your eye gets drawn to the TV, even with the sound off.
Video is perfect for showing pre-recorded material, but can also be used to deliver live video feeds, through simple webcams or top-end video conferencing services, such as telepresence.
Video can do more than show what a camera can capture; it can also be used as a simple, alternative means for displaying a wide range of multimedia material, such as software sims, narrated PowerPoint presentations, scenes from virtual worlds or Flash animations.
When video is not so suitable
Video is not self-paced. Although you may have the facility to rewind and fast forward recorded video, you cannot control the speed at which the audio content is delivered. With a live video stream, you have no control at all. Because video is not self-paced, it provides the viewer with less opportunity for reflection or note-taking.
Because video is the most bandwidth-hungry of all media elements, users with bandwidth constraints will be unable to take advantage. And in those situations where two-way live video is required, each participant must have a webcam installed.
Clearly video has little to offer when the content is not visual in nature or when there is little movement in the visual content.
Optimising video for online delivery
Because online video is typically displayed in a small window, it works best when the subject matter does not contain a lot of fine detail. In years to come, when bandwidth ceases to be much of an issue, then this constraint will drop away and online high-definition playback will be normal.
With pre-recorded video, it makes sense to organise the content into short modules which users can access easily from a menu. In YouTube, you can organise a collection of modules into a playlist with a single URL.
Video can be captured on a portable recording device (a camcorder, a stills camera with a video capability or a phone) or directly into a computer via a webcam. In the case of the latter, it pays to frame the subject carefully and make sure it is well lit. If your material is only ever going to be played back online, there is little to be gained by recording in high definition.
In anything other than live situations, you’ll benefit from carrying out some editing of your content. There are free tools such as Microsoft MovieMaker and Apple’s iMovie, very capable low-cost versions of professional tools, such as Adobe Premiere Elements and, of course, the professional tools, such as Avid, Adobe Premiere and Final Cut Pro. In most cases, the free and low-cost tools are more than adequate for the simple editing required when creating online video.
Note that, to accommodate those users who have a visual or auditory impairment, you need to provide a transcript of any important video material.
Combining video with other elements
Video obviously combines well with audio, because this allows the eye to concentrate on the visual material, while the verbal content is communicated aurally. It would not work to display text alongside a video; if audio really is not feasible, perhaps because users’ computers are not fitted with sound cards, then the text should be superimposed on the video, like sub-titles.
Video does not combine well with a second visual source. Whichever is not the primary focus of attention should be turned off or removed.
How videos are represented online
Video quality is determined by the resolution (the number of pixels making up the image) and the frame rate. As a guide, standard definition TV is displayed at 720×576 / 25 frames per second (fps) in Europe or 720×480 / 30 fps in the USA. High definition has between a two and five times better resolution. Digital audio quality is determined by the sample resolution and frequency and the number of channels (see the audio posting).

Video can be recorded and edited in a wide range of digital formats, but will typically require extensive compression before it is suitable for online delivery. The most common file formats for online video distribution are:
  • MP4 (MPEG-4 / H.264) – user must have Adobe Flash or Apple Quicktime installed
  • FLV (Flash video) – user must have Adobe Flash installed
  • WMV (Windows Media Video) – user must have Windows Media Player installed

The trend is towards Flash video, not least because this is what YouTube uses. For delivery on iPods and similar devices, MP4 is the most common.
Video can be delivered in such a way that it can be downloaded by the user and played offline, or streamed contiinuously to the user with no opportunity for download. To accommodate streaming, a streaming media server is required. As an example, YouTube streams its video, whereas iTunes makes videos available for download.
Most video editing software will be able to export in a wide variety of compression formats.
Previously: text, audio, images, animation