A practical guide to creating learning screencasts: part 1

Practical guidesA screencast is a demonstration of a task carried out in a software application or on a web site for use as a learning aid or for reference.
To create a screencast, you simply carry out all the operations involved in completing the task and the software records this as an animation. This animation can be annotated with text labels, accompanied by an audio narration or both. Some authoring tools allow you to go beyond offering simple demonstrations, to provide the learner with opportunities to try out the tasks for themselves using a simulation of the original software.
This 3-part practical guide explores the potential for screencasting, describes the different types of tools available and provides some tips on how to make a good job of your own screencasts.

Media elements

A screencast contains one essential visual element – an animated software demonstration – supplemented by a verbal explanation, presented either as a series of pop-up text labels, an audio narration or as a combination of the two. Typically screencasts are presented as short, self-contained modules or in short sections, to make it easy for the learner to access the material in small chunks and often to practise as they go.

Interactive capability

Many screencasts are passive, presented as short videos which the learner can review quickly and then try out for real. Others incorporate simulations of software tasks which allow the learner to practise without having to leave the screencast and use the real application.
In their passive form, the most likely strategy for the use of screencasts is exploration, as material for use by learners at their own discretion, typically for reference. When simulated tasks are incorporated into the screencasts or when screencasts are combined with other activities that allow the learner to practise what they have learned, they can also play a key role in an instructional strategy.

Applications

Screencasts have two very obvious applications: they can be used as part of a formal training programme to introduce a new or revised software application or web site, or as reference material for people who are already users.

Screencasting tools

Some screencasting tools have been around for many years, long before the term ‘screencasting’ had been coined. These tools, like Techsmith Camtasia and Adobe Captivate, are desktop applications with sophisticated functionality. Over the years, their capabilities have been increased to support many forms of digital learning content, not just screencasts. These tools allow many ways for the learner to interact with the screencast and to undertake assessments. They also allow the author much greater control over the way in which the screencast is displayed.
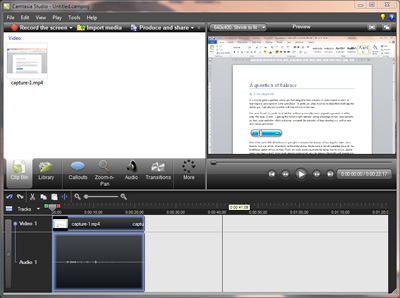
Camtasia
Desktop tools such as Camtasia provide much of the functionality of a video editor and an elearning authoring tool

Other, much more recent tools, such as screenr and screenjelly, operate ‘in the cloud’. They allow you to create simple software demonstrations ‘all in one take’ and then to publish these online. In the next part of this guide we’ll be taking a much closer look at these online tools.
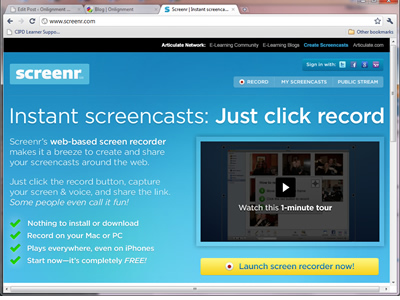
screenr
Simple online tools such as screenr allow you to produce screencasts in one take

Coming next: creating all-in-one-take screencasts
Thanks to Craig Taylor for inspiring this guide with his session at the eLearning Network event on April 8th.

A practical guide to creating learning slide shows: part 3 – the narration

Practical guidesIn the first part of this practical guide, we discussed the potential of stand-alone slide presentations as a tool for learning. In the second installment, we looked at the visual element in the presentation – the slides. This time we look at the auditory component – the narration.

Packaging up a live presentation

The way you approach the narration will depend on whether you are (1) packaging up a presentation that you have previously delivered live, or (2) creating a stand-alone slide show from scratch. In the case of the former, the presentation will most likely represent you and your perspective on the topic in hand – you will want to record the voiceover yourself and retain as much of the personality of the original presentation as possible. That means keeping it natural and informal. Assuming you didn’t read from a script when you presented live (and let’s hope that’s the case), then you won’t want to read from a script now. Try to capture the buzz of the live presentation by imagining you are presenting to a live audience. Or why not record it live? You can always edit it down afterwards to remove any superfluous elements.

Public speaker
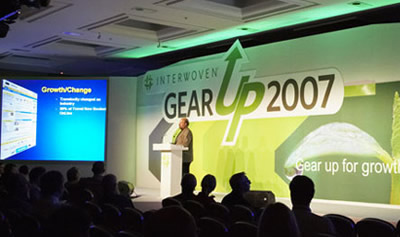
If you're packaging up a presentation you delivered live, you'll want to retain its personality.

Designing specifically for stand-alone use

On the other hand, you may be designing a slide show that will only ever be used as a piece of learning content. It is not intended as a personal statement and it won’t be attributed to you. In this case you are almost definitely best off writing a script and you should seriously consider using a professional voiceover artist to deliver this. Why? Because professional voiceover artists are very good at reading a script so it doesn’t sound like they’re reading a script. By and large, the rest of us aren’t.

Script for speaking

When scripting, it’s hard to avoid slipping into report writing mode. Keep reminding yourself that the words you are writing will be read aloud, not read from the screen. Try saying the words out loud yourself and keep revising them until you can put them across effortlessly.

Voiceover artist
Remember your script will be read aloud, not as a report.

Use a conversational tone

Whatever you do, avoid ‘corporate drone’. Write as you would speak. That means short sentences, simple language, the active voice (“The cat ate the mouse” not “The mouse was eaten by the cat”), and a free use of contractions (“I can’t remember …” not “I cannot remember …”). You can also help the voiceover artist by making absolutely clear (perhaps in bold type) which words need special emphasis.

Don’t duplicate your voiceover as on-screen text

Your learner’s brain can cope with one verbal channel (in this case the voiceover) but not two. If words are coming at you from two places at once, you’ll just overload. If absolutely necessary, emphasise key points and headings with on-screen text, but please don’t display your script verbatim.
Coming next: distribution

A practical guide to creating learning slide shows: part 2 – the slides

Practical guidesIn the first part of this practical guide, we reviewed the capabilities of, and applications for, packaged slide presentations as a tool for learning. In this second installment, we look in more detail at the visual element in the presentation – the slides. Next time we’ll examine the best ways to go about recording a narration.

What your slides must achieve

If your slide show is going to be packaged with an audio narration, then your slides have very much the same function as they would do in a live presentation – they convey the visual element, while a voice delivers the words. In this context, slides are visual aids. With photographs, illustrations, diagrams and charts, they capture the viewer’s attention, clarify meaning and improve retention. With the sparing use of on-screen text, they can also help to reinforce key elements of the verbal content, but the prime purpose is always visual.
Without narration, your slides have to accomplish both roles – the visual and the verbal. In this respect they need a very different design focus to a live presentation. Take the following example of a slide taken from a live presentation that was converted to stand alone, without narration, on slideshare.net. A section of the slide has been allocated to a running textual commentary, essentially a much simplified version of the original presenter’s words:

Slides with ot without narration
When there is no narration, the slide must be amended to include the verbal information,

Not that this is the only way of displaying the verbal content. If, rather than converting a live presentation, you were designing a stand-alone and un-narrated slide show from scratch, you could use all sorts of devices to display the words, like the speech bubbles used in this example:
A slide with a thought bubble
There are many ways to incorporate the narrative into the slides.

Another consideration is the distance from which your slides will be viewed. In a live presentation, your audience is likely to be some way from the screen, whereas when the slides are used for self-study, they will be up close. Whether this matters depends on the device the audience will be using to view the presentation (this could be anything from a smart phone to a large PC monitor) and the size of the window in which your presentation will be displayed. You may be able to get away with displaying more detail than you would when live, but this needs testing.

An argument for imagery

Only an expert wordsmith can conjure up with words what a person, object or event actually looks like. Only an expert teacher can explain a concept or process clearly using words alone. And only a wonderful presenter can make a lasting impact on an audience without the use of imagery. As the saying goes, “a picture is worth ten thousand words”. Pictures show, quite effortlessly, what things really look like. They clarify concepts and processes. They stick in the memory. All you have to do is use them.

Charts make meaning from the numbers
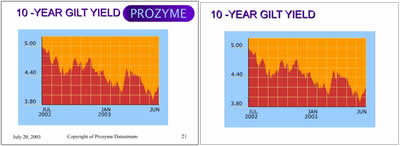
Charts clarify numeric data that might otherwise be indigestible.

Pictures come in a variety of forms to suit different situations. Photographs portray what things look like; diagrams clarify concepts and processes; illustrations make the abstract more memorable. Presentation software such as PowerPoint makes it easy to employ pictures in all these forms. Your task is to avoid the lazy option – clip art – and to find the picture that really does tell a story.

Break the mould

It’s all too simple to use the standard templates provided by your presentation software, but these won’t always do justice to your images. Take these two examples:

Break free from the templates
The title doesn't have to be centred at the top of the screen - it can be positioned to complement the image.

Avoid the standard templates
Again, with a little care you can break the mould. Here the image has been tinted blue.

You can definitely do without the slide junk – the logos, headers and footers that appear on every slide. There’s a place for your logo and that’s on the title slide (OK and maybe at the end as well). And you don’t really need all that clutter at the bottom of each slide – you’re producing slides, remember, not a report.
Remove the slide junk
Remove the slide junk - your corporate communications department doesn't always know best.

Text is also OK in moderation
You’ve probably heard of the expression “death by PowerPoint”. You’ve probably experienced it.
Death by PowerPoint
Admit it, you've been there ...

Yes, we’ve all been there, and yet we put up with it – see The Emperor’s New Slide Show.
Well, by far the biggest complaint you will hear from presentation audiences is that the slides contain too much text. In his book The Great Presentation Scandal, John Townsend relates how he counted the number of words and figures on every slide at a conference he was attending. The overall average was 76. That’s right, 76.
Too much text
If you've got two levels of bullets then you've no longer got a visual aid.

Given this, you may find it surprising that we could be recommending the use of text as a visual aid when the real problem is that there’s far too much of it. This is a fair point, but text can be useful as a visual aid, when you need to highlight the start of a new section, emphasise a key point, list a number of related points or present data in the form of a table.
If you do keep the amount of text on your slides to a minimum, it will have that much more impact when it does appear; particularly if you know when to use it and how to lay it out like the professionals. If you obey a few simple guidelines, that’s what you will achieve.

Use your slides to tell a story

A presentation is much more than a collection of independent thoughts accompanied by visual aids – however interesting the thoughts and however brilliant the visuals. Just like a novel, a radio play or a film, it has a beginning, an end and a carefully planned route in between.
Too many presentations look like they have been constructed by simply extracting slides from previous presentations. Although re-using slides is fine, if they are appropriate to the task in hand, this is never going to be enough to do the job. Like a film director, you have to look at the big picture, using words and images to manipulate your audience’s attention and their emotions. There is no black art to this; you just need a little imagination and a simple structure.
Coming next: the narration

A practical guide to creating learning slide shows: part 1

Practical guidesIn a learning context, slides have traditionally been used as ‘speaker support’ – visual aids to support live presentations. However, slide shows produced using Microsoft’s PowerPoint or Apple’s Keynote also provide a useful way to deliver packaged content for self-directed learning. This practical guide explores the potential for packaged slide shows as a learning tool and describes the many ways in which these can be developed and deployed.

Slides as speaker support
Slides have traditionally been used primarily for speaker support

Media elements

A slide show can incorporate all major media elements. Although the dominant forms are always likely to be still images and text, presentation software also makes it possible to animate the text and images on slides, as well as to import audio and video.

Interactive capability

As we shall see, there are many ways of distributing slide shows. Many of these are essentially passive – you watch the slide show as you would a video. Although some formats – including native PowerPoint – have the potential for quite sophisticated interactivity, this is not the normal use of packaged slide shows and we will not be examining this application in any detail in this practical guide.
As passive media, the use of packaged slide shows is largely limited to the following learning strategies:
Exposition – required viewing as part of a set curriculum
Exploration – as developmental material for use by learners at their own discretion
Slide shows could also act as supporting material within other strategies – instruction and guided discovery – but only as one element in a blend.

Applications

While limited in terms of interactive capability, slide shows have a great many applications. Even without narration, they can provide a visually-dynamic and engaging way to present relatively small chunks of learning content. Where they are less suitable is in presenting large bodies of text. Text is much more satisfactorily handled on a web page or in a PDF, both of which more easily allow the reader to search and scan.

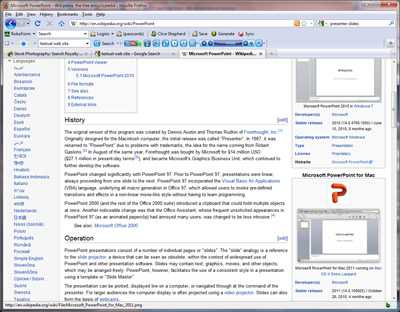
WIkipedia page
If you want to present lots of text, you're better off using a web page

When combined with an audio narration, slide shows take on many of the characteristics of video, allowing the learner to maintain visual focus on a sequence of images while these are explained in audio. Obviously if the intention is to depict actual events, in full motion, slides will not do as well as material captured with a video camera.

Formats

You have a wide range of distribution formats to choose from, each with its own distinct capabilities:

Animation? Interactivity? Narration? Easy distribution?
Native PowerPoint/Keynote Yes Yes Yes Yes if users have the application used to create
the presentation
PDF No No No Yes
Flash (using tools such as Articulate, Adobe Presenter or Snap! by Lectora) Yes Yes Yes Must be uploaded to an LMS/web server
Video Yes No Yes Yes but large files
SlideShare No No Only with special ‘Slidecasting’ facility Yes if users have Internet access.You can embed the
presentations in blogs and web pages

We’ll be examining these options in much more detail in future postings.
Coming next: creating the slides

A practical guide to creating learning podcasts: part 3 – editing and distributing your podcast

Practical guidesIn part 1 of this guide, we looked at what podcasts are and how they can be used. In part 2 we examined how you prepare for and then record your podcasts. In this final part, we look at what you can do to enhance your recording and prepare it for distribution.

Post-production

It could be that, when you listen to your podcast recording, it sounds great and you’re happy to release it as is. Perhaps you recorded it in a studio and the engineer has supplied you with a perfect master. Even if not, sometimes a ‘rough and ready’ approach is all that’s required and the priority is to get your podcast out as quickly as possible. However, a little care in editing could make your recording sound very much more professional, so it’s probably worth getting to know what is possible.

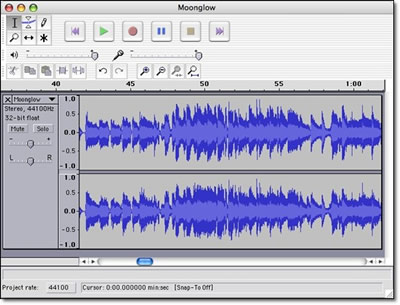
Audacity
Use a tool like Audacity to edit your audio

First priority is to delete unwanted ‘takes’, cut out any silences and remove any obvious mistakes. To do this, you’ll need some audio editing software. If you have access to professional quality software and know how to use it then great, but you’ll only need basic functionality and a simple editor like the free Audacity is all that you really require. Audio edits are achieved using simple cut, copy and paste functions, just like word processing, except here you’ll be editing an audio waveform rather than blocks of text. This is easier than it might sound, because the waveform indicates quite clearly where in the recording there is speech and where there is silence. If you’re finding it hard to locate exactly the point in the recording that you wish to edit, you can easily zoom in and enlarge the waveform.
You might like to consider editing in a short piece of music at the beginning and end of your podcast, just like you’d hear on a radio programme. If it’s not your own music, then you’ll either need to pay a royalty or use a clip from one of the royalty-free audio sites.
If the audio volume levels in your recording vary too widely, you can either select the offending pieces and raise or lower the volumes, or apply a ‘compression’ effect. Compression automatically reduces peaks and boosts low signals, so there is less difference between the loudest and softest pieces.
If your podcast is lengthy, i.e. more than ten minutes, you might consider chopping it up at this point into a number of shorter ‘episodes’. This will obviously involve you in some more file manipulation, but it will also reduce the size of each podcast file, thus speeding up download, as well as making it easier for listeners to access the content that they are most interested in.
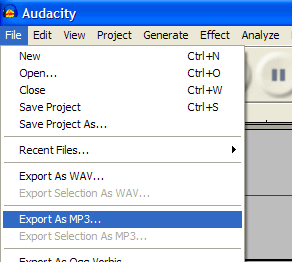
Exporting to MP3
Export your finished podcast as an MP3 file

When you are completely happy with your recording, your next step is to convert your file to MP3 format for distribution. Assuming the main content of your file is the spoken word, you can safely export to MP3 at 64Kbps / 44.1Khz / mono. Don’t worry if you don’t understand these technicalities – you just need to choose the right option from the list! If you’re unhappy with the quality, try upping the bit rate to 128Kbps. You might want to use the stereo option if your podcast contains an interview or panel discussion, but only if you recorded it in stereo!

Distribution

So, your podcast is ready. Now all you need to do is make it as easy as possible for people to listen to it. You have plenty of options:

  • Send it round as an email attachment.
  • Attach it to a forum or blog posting.
  • Upload it to your learning management system or virtual learning environment.
  • Make it available on your web site or intranet.

Listeners could themselves, if they wish, import your podcast into iTunes and allow the software to copy the file over to their iPod for listening on the move. This involves you in no work, but is not the friendliest option, particularly if you are going to be releasing a series of podcasts. Much better to set up your podcasts so users can subscribe to the whole series. That way, each time you release a new podcast, iTunes will automatically download it and copy it to the user’s iPod at the next available opportunity. For this to work, your podcast needs to be made available with an RSS (Really Simple Syndication) feed. All blog posts work with RSS, so this is one way of setting up the feed – simply set up a new blog and attach each new podcast to a new post. Alternatively, use one of the many available podcast hosting services. Make sure you label your RSS feed with an appropriate title, author name and description – for more details, see Apple’s own guide to Making a Podcast.

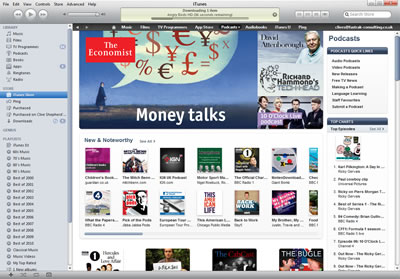
iTunes
Your podcasts can be listed in the iTunes Podcast Directory

That concludes this podcasting guide, one of a whole series of how-to guides that we’ll be posting on the Onlignment blog this year. They will all be included (along with suitable pics!) in our Digital Learning Content: A Designer’s Guide e-book, due for release later in the year.
Happy podcasting!
Download this series of posts as a PDF

A practical guide to creating learning podcasts: part 2 – preparing for and recording your podcast

Practical guidesIn part 1 of this guide, we looked at what podcasts are and how they can be used. In part 2 we move on to look at how you prepare for and then record your podcast.

Pre-production

A podcast needs a plan. Even if you are intending just to thrust a microphone in front of an unsuspecting interviewee, you need to know what questions you are going to ask and who would be best equipped to answer them. As I mentioned in the previous posting, radio is an excellent model here. The presenter of the programme would have researched the topic, got to know a little about their guests and prepared their questions. They would be mindful of how long each segment of the programme was intended to last.
Scripting:
As a general rule, a script is only needed for a monologue and monologues should only be used in moderation. Listeners tune out when the same voice goes on for too long, however interesting the speaker. On radio, they would only rarely hold on a single voice for more than a few minutes. But if a monologue really is what is required, think first about whether a script is absolutely essential.

Bored listener
Listeners will tune out if the same voice goes on for too long

Professional voiceover artists are very good at reading a script so it doesn’t sound like they’re reading a script. By and large, the rest of us aren’t. If you’re going to be doing the voice as well as preparing the script and you feel confident enough to work directly from your outline, then go for it. An alternative is to do a trial recording with you improvising from the outline, then convert this to a full script, ironing out the less successful elements. That way, you’ll end up with a tight script that sounds natural.
Voiceover artist
A professional voiceover artist can make reading from a script sound natural

When scripting, it’s hard to avoid slipping into report writing mode. Keep reminding yourself that the words you are writing will be read aloud, not from the screen. Try speaking the words yourself and keep revising until you can put them across effortlessly.
Whatever you do, avoid what Cathy Moore calls corporate drone. Write as you would speak. That means short sentences, simple language, active voice (“The cat ate the mouse” not “The mouse was eaten by the cat” ) and contractions (“I can’t remember …” not “I cannot remember …”). You can also help yourself by making absolutely clear (perhaps in bold type) which words need special emphasis.

Production

Professional recording:
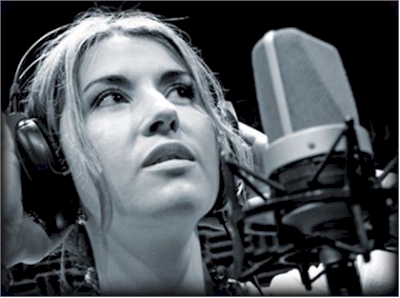
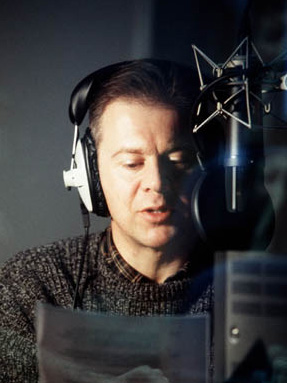
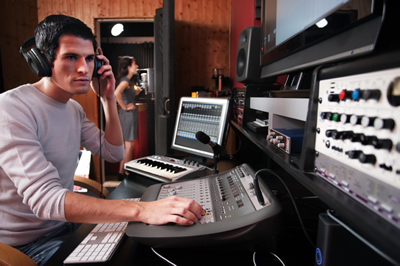
When it comes to recording your podcast, nothing beats a recording studio. Here you will be able to record in perfect conditions, in a specially-prepared room without excessive reverberations or extraneous noise, with an engineer who handles all the technical stuff allowing you to concentrate on communicating, and with the right microphones and editing equipment to ensure a perfect recording. So, if you can, choose this option first. Studios are nowhere near as expensive as you might think and there are lots of them around. If you prepare well, so you can get on with the recording without delay, you probably only need to book for one or two hours.

Recording studio
You can't beat a professional recording studio for quality

At the end of the session, have the engineer provide you with all the digital files in their highest quality format , i.e. as they were recorded, ideally with all the obvious mistakes and pauses edited out. If you do ask the engineer to convert the files into their final, compressed format, then make sure you are also provided with copies of the originals, so you can easily make changes in the future.
Doing-it-yourself:
Of course it will not always be possible to use a professional recording studio, either because of budget or because you haven’t got time to get it all organised. If you’re going to do the recording yourself, then with a little care you can still obtain excellent results. Working with one microphone is always going to be easier. Of course if you’re recording a monologue, then that’s all you will need, but even with interviews you can still manage:

  • You can direct the mic at the interviewee to record all the answers to the questions, then record your questions again later. This will mean that you have to edit the questions in, which will require some cutting and pasting.
  • You can use a hand-held mic and direct it at whoever’s speaking at the time. This will work fine as long as you don’t talk across each other.
A radio interview
You can use a single hand-held mic to record interviews
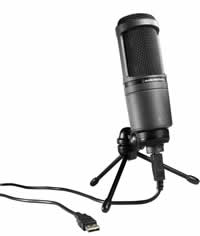
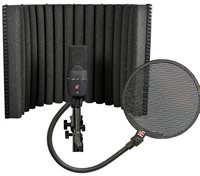
Although almost any microphone will deliver reasonable results when recording speech, it pays to use a decent one. Assuming you’re not wanting to hand hold the mic and you’re recording directly to a computer, then you should look at a USB condenser mic. There are now lots available and you shouldn’t have to pay over $100. It pays to add a pop shield, an inexpensive accessory that stops the signal level exploding whenever the letter ‘p’ is spoken (and yes, this does make a real difference). If you want to get recording studio quality, you might also purchase portable soundproofing materials for deadening the sound. See Soundproofing and acoustics for podcasters.

USB condenser mic
USB condenser mic

Soundproofing and pop shield
Portable soundproofing and pop shield

However good the microphone, you need to ensure a good quality signal. That means positioning the mic 4 or 5 inches away from whoever is speaking and setting the input level on your computer or recording device as high as you can without suffering ‘clipping’ (digital overload) when someone speaks loudly.
Mixer
If you record with multiple mics, you'll need a mixer

Multiple mics:
If you are running a panel discussion or want to conduct an interview without worrying about who’s got the mic and when, then you’ll need more than one mic. That makes things a little more complicated, because you’ll then need some sort of ‘mixer’ to sit between the mics and the computer or recording device. The mixer allows you to plug in multiple mics, balance the volumes, position the various inputs in the stereo mix and provide a single, combined signal for recording. If all this is too much for you, you probably are better off using a professional facility.
Coming next: Part 3 – editing and distributing your podcast
Download this series of posts as a PDF

A practical guide to creating learning podcasts: part 1 – coming to terms with podcasts

Practical guidesThe simplest way to look upon a podcast is as an audio recording. Strictly speaking, podcasting is a more sophisticated concept than this, which involves a user subscribing to an ongoing series of recordings, which are then automatically downloaded to the user’s computer as they are released, and then copied to the user’s iPod or similar MP3 player for listening to as and when the user wishes. In practice, once you have produced a learning podcast, you don’t really mind how it is accessed. Yes, lots of users will find it convenient to listen to the recordings on their iPods while they commute to work, walk in the park or workout in the gym, but they might find it just as useful to listen to the podcasts directly from their PC or even from an audio CD.

Listening to a podcast on a laptop
You can listen to a podcast as well from a laptop as you can from an iPod

Media elements

A podcast can employ only one media element and that’s audio. Although, in general use, podcasts will often contain music, for learning purposes the primary component will usually be speech. As an alternative verbal channel to text, speech benefits because it conveys tone of voice as well as the words, but the listener is not able to control the pace at which the words are delivered. Delivery of the spoken word is much slower than the speed at which a person can read, which makes a podcast an unsuitable tool for reference information. Although audio does have limitations as a stand-alone medium, it allows the listener to maintain visual attention on the environment around them, which they would certainly need to do if they were on the move.
For more information on audio as a medium, see our posting The elements of online communication: audio.

Runner using an iPod
The fact that a podcast is an audio-only medium leaves the eyes free to concentrate on other things

Interactive capability

A podcast is a passive medium with no interactive capability except simple navigation. As such, its use is limited to the following learning strategies:

  • Exposition – required listening as part of a set curriculum
  • Exploration – as developmental material for use by learners at their own discretion

Podcasts could also act as supporting material within other strategies – instruction and guided discovery – but only as one element in a blend.

Applications

While limited in terms of media elements and interactive capability, podcasts have a great many applications. You should be encouraged by the success of radio over more than eighty years. Radio has the same limitations – audio only, no interaction – yet continues to entertain and inform hundreds of millions of people daily. While it is easy to think of podcasts as a way of delivering monologues – such as lectures – you will rarely find this technique in use on the radio. The best applications employ multiple voices and a lively, informal style. Consider using podcasts for interviews, panel discussions, debates and drama. Wrap these up in familiar radio formats such as news shows, plays, talk shows, reports from the field, journalistic investigations and so on.

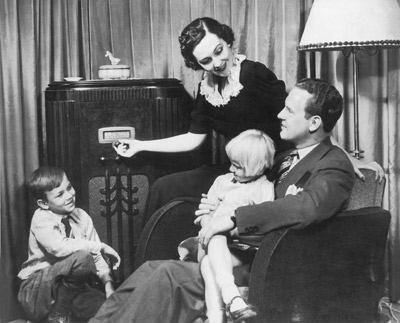
Family listening to the radio
The power of audio can be easily demonstrated by the enduring success of radio

Part 2 – Preparing for and recording your podcast
Download this series of posts as a PDF