A practical guide to creating learning podcasts: part 3 – editing and distributing your podcast

Practical guidesIn part 1 of this guide, we looked at what podcasts are and how they can be used. In part 2 we examined how you prepare for and then record your podcasts. In this final part, we look at what you can do to enhance your recording and prepare it for distribution.

Post-production

It could be that, when you listen to your podcast recording, it sounds great and you’re happy to release it as is. Perhaps you recorded it in a studio and the engineer has supplied you with a perfect master. Even if not, sometimes a ‘rough and ready’ approach is all that’s required and the priority is to get your podcast out as quickly as possible. However, a little care in editing could make your recording sound very much more professional, so it’s probably worth getting to know what is possible.
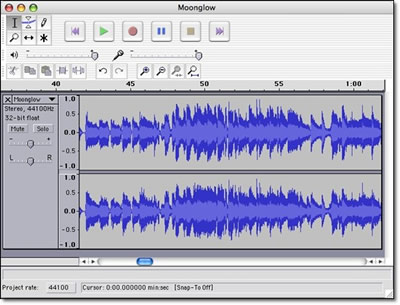
Audacity
Use a tool like Audacity to edit your audio

First priority is to delete unwanted ‘takes’, cut out any silences and remove any obvious mistakes. To do this, you’ll need some audio editing software. If you have access to professional quality software and know how to use it then great, but you’ll only need basic functionality and a simple editor like the free Audacity is all that you really require. Audio edits are achieved using simple cut, copy and paste functions, just like word processing, except here you’ll be editing an audio waveform rather than blocks of text. This is easier than it might sound, because the waveform indicates quite clearly where in the recording there is speech and where there is silence. If you’re finding it hard to locate exactly the point in the recording that you wish to edit, you can easily zoom in and enlarge the waveform.
You might like to consider editing in a short piece of music at the beginning and end of your podcast, just like you’d hear on a radio programme. If it’s not your own music, then you’ll either need to pay a royalty or use a clip from one of the royalty-free audio sites.
If the audio volume levels in your recording vary too widely, you can either select the offending pieces and raise or lower the volumes, or apply a ‘compression’ effect. Compression automatically reduces peaks and boosts low signals, so there is less difference between the loudest and softest pieces.
If your podcast is lengthy, i.e. more than ten minutes, you might consider chopping it up at this point into a number of shorter ‘episodes’. This will obviously involve you in some more file manipulation, but it will also reduce the size of each podcast file, thus speeding up download, as well as making it easier for listeners to access the content that they are most interested in.
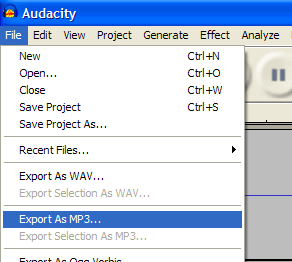
Exporting to MP3
Export your finished podcast as an MP3 file

When you are completely happy with your recording, your next step is to convert your file to MP3 format for distribution. Assuming the main content of your file is the spoken word, you can safely export to MP3 at 64Kbps / 44.1Khz / mono. Don’t worry if you don’t understand these technicalities – you just need to choose the right option from the list! If you’re unhappy with the quality, try upping the bit rate to 128Kbps. You might want to use the stereo option if your podcast contains an interview or panel discussion, but only if you recorded it in stereo!

Distribution

So, your podcast is ready. Now all you need to do is make it as easy as possible for people to listen to it. You have plenty of options:

  • Send it round as an email attachment.
  • Attach it to a forum or blog posting.
  • Upload it to your learning management system or virtual learning environment.
  • Make it available on your web site or intranet.

Listeners could themselves, if they wish, import your podcast into iTunes and allow the software to copy the file over to their iPod for listening on the move. This involves you in no work, but is not the friendliest option, particularly if you are going to be releasing a series of podcasts. Much better to set up your podcasts so users can subscribe to the whole series. That way, each time you release a new podcast, iTunes will automatically download it and copy it to the user’s iPod at the next available opportunity. For this to work, your podcast needs to be made available with an RSS (Really Simple Syndication) feed. All blog posts work with RSS, so this is one way of setting up the feed – simply set up a new blog and attach each new podcast to a new post. Alternatively, use one of the many available podcast hosting services. Make sure you label your RSS feed with an appropriate title, author name and description – for more details, see Apple’s own guide to Making a Podcast.
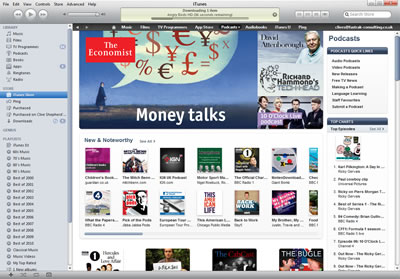
iTunes
Your podcasts can be listed in the iTunes Podcast Directory

That concludes this podcasting guide, one of a whole series of how-to guides that we’ll be posting on the Onlignment blog this year. They will all be included (along with suitable pics!) in our Digital Learning Content: A Designer’s Guide e-book, due for release later in the year.
Happy podcasting!
Download this series of posts as a PDF

A practical guide to creating learning podcasts: part 2 – preparing for and recording your podcast

Practical guidesIn part 1 of this guide, we looked at what podcasts are and how they can be used. In part 2 we move on to look at how you prepare for and then record your podcast.

Pre-production

A podcast needs a plan. Even if you are intending just to thrust a microphone in front of an unsuspecting interviewee, you need to know what questions you are going to ask and who would be best equipped to answer them. As I mentioned in the previous posting, radio is an excellent model here. The presenter of the programme would have researched the topic, got to know a little about their guests and prepared their questions. They would be mindful of how long each segment of the programme was intended to last.
Scripting:
As a general rule, a script is only needed for a monologue and monologues should only be used in moderation. Listeners tune out when the same voice goes on for too long, however interesting the speaker. On radio, they would only rarely hold on a single voice for more than a few minutes. But if a monologue really is what is required, think first about whether a script is absolutely essential.

Bored listener
Listeners will tune out if the same voice goes on for too long

Professional voiceover artists are very good at reading a script so it doesn’t sound like they’re reading a script. By and large, the rest of us aren’t. If you’re going to be doing the voice as well as preparing the script and you feel confident enough to work directly from your outline, then go for it. An alternative is to do a trial recording with you improvising from the outline, then convert this to a full script, ironing out the less successful elements. That way, you’ll end up with a tight script that sounds natural.
Voiceover artist
A professional voiceover artist can make reading from a script sound natural

When scripting, it’s hard to avoid slipping into report writing mode. Keep reminding yourself that the words you are writing will be read aloud, not from the screen. Try speaking the words yourself and keep revising until you can put them across effortlessly.
Whatever you do, avoid what Cathy Moore calls corporate drone. Write as you would speak. That means short sentences, simple language, active voice (“The cat ate the mouse” not “The mouse was eaten by the cat” ) and contractions (“I can’t remember …” not “I cannot remember …”). You can also help yourself by making absolutely clear (perhaps in bold type) which words need special emphasis.

Production

Professional recording:
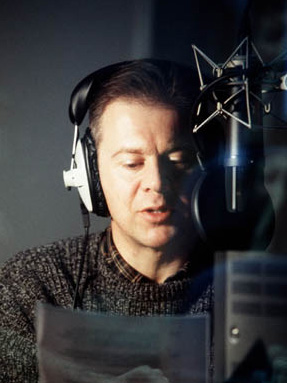
When it comes to recording your podcast, nothing beats a recording studio. Here you will be able to record in perfect conditions, in a specially-prepared room without excessive reverberations or extraneous noise, with an engineer who handles all the technical stuff allowing you to concentrate on communicating, and with the right microphones and editing equipment to ensure a perfect recording. So, if you can, choose this option first. Studios are nowhere near as expensive as you might think and there are lots of them around. If you prepare well, so you can get on with the recording without delay, you probably only need to book for one or two hours.

Recording studio
You can't beat a professional recording studio for quality

At the end of the session, have the engineer provide you with all the digital files in their highest quality format , i.e. as they were recorded, ideally with all the obvious mistakes and pauses edited out. If you do ask the engineer to convert the files into their final, compressed format, then make sure you are also provided with copies of the originals, so you can easily make changes in the future.
Doing-it-yourself:
Of course it will not always be possible to use a professional recording studio, either because of budget or because you haven’t got time to get it all organised. If you’re going to do the recording yourself, then with a little care you can still obtain excellent results. Working with one microphone is always going to be easier. Of course if you’re recording a monologue, then that’s all you will need, but even with interviews you can still manage:

  • You can direct the mic at the interviewee to record all the answers to the questions, then record your questions again later. This will mean that you have to edit the questions in, which will require some cutting and pasting.
  • You can use a hand-held mic and direct it at whoever’s speaking at the time. This will work fine as long as you don’t talk across each other.
A radio interview
You can use a single hand-held mic to record interviews
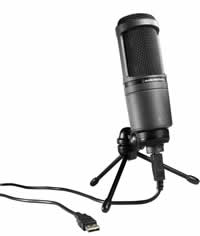
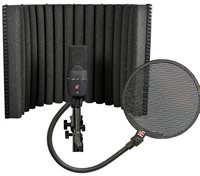
Although almost any microphone will deliver reasonable results when recording speech, it pays to use a decent one. Assuming you’re not wanting to hand hold the mic and you’re recording directly to a computer, then you should look at a USB condenser mic. There are now lots available and you shouldn’t have to pay over $100. It pays to add a pop shield, an inexpensive accessory that stops the signal level exploding whenever the letter ‘p’ is spoken (and yes, this does make a real difference). If you want to get recording studio quality, you might also purchase portable soundproofing materials for deadening the sound. See Soundproofing and acoustics for podcasters.

USB condenser mic
USB condenser mic

Soundproofing and pop shield
Portable soundproofing and pop shield

However good the microphone, you need to ensure a good quality signal. That means positioning the mic 4 or 5 inches away from whoever is speaking and setting the input level on your computer or recording device as high as you can without suffering ‘clipping’ (digital overload) when someone speaks loudly.
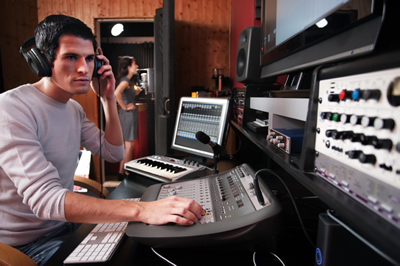
Mixer
If you record with multiple mics, you'll need a mixer

Multiple mics:
If you are running a panel discussion or want to conduct an interview without worrying about who’s got the mic and when, then you’ll need more than one mic. That makes things a little more complicated, because you’ll then need some sort of ‘mixer’ to sit between the mics and the computer or recording device. The mixer allows you to plug in multiple mics, balance the volumes, position the various inputs in the stereo mix and provide a single, combined signal for recording. If all this is too much for you, you probably are better off using a professional facility.
Coming next: Part 3 – editing and distributing your podcast
Download this series of posts as a PDF
A practical guide to creating learning podcasts: part 1 – coming to terms with podcasts

Practical guidesThe simplest way to look upon a podcast is as an audio recording. Strictly speaking, podcasting is a more sophisticated concept than this, which involves a user subscribing to an ongoing series of recordings, which are then automatically downloaded to the user’s computer as they are released, and then copied to the user’s iPod or similar MP3 player for listening to as and when the user wishes. In practice, once you have produced a learning podcast, you don’t really mind how it is accessed. Yes, lots of users will find it convenient to listen to the recordings on their iPods while they commute to work, walk in the park or workout in the gym, but they might find it just as useful to listen to the podcasts directly from their PC or even from an audio CD.

Listening to a podcast on a laptop
You can listen to a podcast as well from a laptop as you can from an iPod

Media elements

A podcast can employ only one media element and that’s audio. Although, in general use, podcasts will often contain music, for learning purposes the primary component will usually be speech. As an alternative verbal channel to text, speech benefits because it conveys tone of voice as well as the words, but the listener is not able to control the pace at which the words are delivered. Delivery of the spoken word is much slower than the speed at which a person can read, which makes a podcast an unsuitable tool for reference information. Although audio does have limitations as a stand-alone medium, it allows the listener to maintain visual attention on the environment around them, which they would certainly need to do if they were on the move.
For more information on audio as a medium, see our posting The elements of online communication: audio.

Runner using an iPod
The fact that a podcast is an audio-only medium leaves the eyes free to concentrate on other things

Interactive capability

A podcast is a passive medium with no interactive capability except simple navigation. As such, its use is limited to the following learning strategies:

  • Exposition – required listening as part of a set curriculum
  • Exploration – as developmental material for use by learners at their own discretion

Podcasts could also act as supporting material within other strategies – instruction and guided discovery – but only as one element in a blend.

Applications

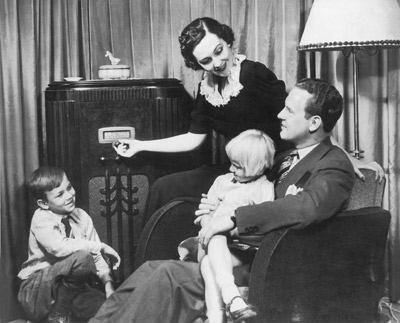
While limited in terms of media elements and interactive capability, podcasts have a great many applications. You should be encouraged by the success of radio over more than eighty years. Radio has the same limitations – audio only, no interaction – yet continues to entertain and inform hundreds of millions of people daily. While it is easy to think of podcasts as a way of delivering monologues – such as lectures – you will rarely find this technique in use on the radio. The best applications employ multiple voices and a lively, informal style. Consider using podcasts for interviews, panel discussions, debates and drama. Wrap these up in familiar radio formats such as news shows, plays, talk shows, reports from the field, journalistic investigations and so on.

Family listening to the radio
The power of audio can be easily demonstrated by the enduring success of radio

Part 2 – Preparing for and recording your podcast
Download this series of posts as a PDF