A practical guide to creating learning scenarios: part 4

Practical guidesIn part 1 of this series, we looked at what a learning scenario is, its basic structure, capabilities and applications. In part 2 we saw how simple scenarios could be used to help learners to undertake principle-based tasks. In part 3 we looked at how you could use simple scenarios to help learners to practise rule-based tasks. In this final part, we turn our attention to branching scenarios, which provide a more immersive approach to learning principle-based tasks. This builds on what we covered in part 2, so you might want to check back on that first. Our focus us here is on what it means for a scenario to be branching.

Why branching?

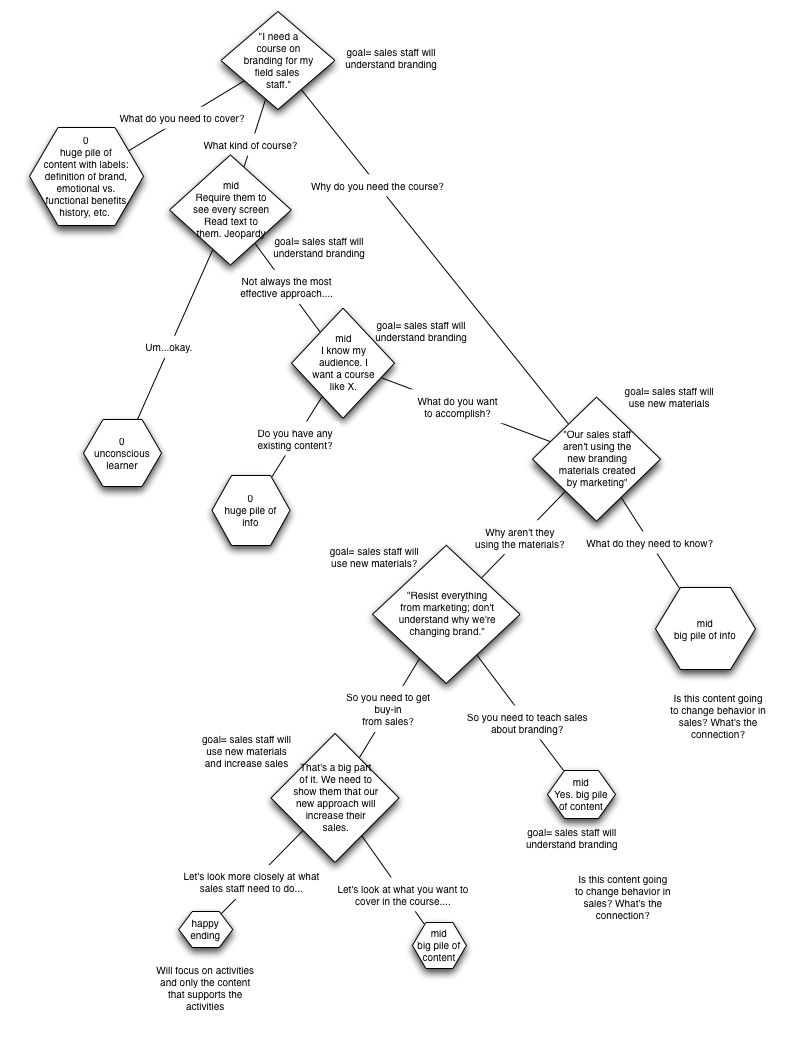
To understand the value of branching, you first need to understand how a scenario looks when it doesn’t branch:
Linear scenario
The diagram shows the learner being presented with a situation (S) and three choices. The learner is then immediately provided with feedback (F), related directly to the choice that they have made, pointing out positive aspects and correcting any misunderstandings or errors. All learners then proceed to the second stage of the scenario. Although the feedback can be considered to be branching, the overall path is linear.
While a linear scenario works well it many situations, it doesn’t resemble real life, where you get to experience the results of your decisions, for better or for worse.
With a branching scenario, it will be possible for different learners to progress along different routes through the scenario and to experience different end points. Where you arrive depends on the decisions you make along the way.
Branching scenario
The diagram shows only the initial two stages in the scenario – there could, of course, be many more. As you can imagine, if at every stage the scenario trebled in size (assuming three choices) it would soon become unmanageable. In practice, many branching scenarios return to a common narrative at key points or kick the learner out early if their initial choices represent fatal mistakes.

Providing the learner with feedback

Looking at the second flow chart above, you might wonder where all the feedback went! Well, first and foremost, feedback is implicit in the branching that occurs. If you shouted at the customer in situation 1, you’ll get your payback in situation 2.
Another way that feedback can be provided is with some sort of visual indicator, as the following examples show:

Extracts from Cathy Moore scenario
This scenario aims to help you make the transition from order taker to instructional designer and the meter at the bottom left gives you an update on your progress. On the right is an example of the feedback the scenario provides.

Thanks to Cathy Moore for this one. You might also be interested in the flowchart that Cathy created to help her design and test this scenario.
Extract from Montana scenario
This scenario, produced using the Rapid Intake tool, provides you with a traffic light indicator of how well you are doing as you progress through.

Extract from Montana scenario
At the end of the scenario, you are provided with detailed feedback on each one of your responses. You can then start again if you wish.

And thanks to Garin Hess at Rapid Intake for this example, which shows how comprehensive feedback can be provided at the end of the scenario.

Deciding on the look and feel

You can use any combination of still images, text, audio and video to present the situations in your scenarios, although the evidence is stacked against using text and speech simultaneously. Your decision is likely to be made on the basis of (1) how much realism is needed to adequately convey the situation, and (2) how much time and money you have got available to you.
Cathy Moore, along with her friends at Kinection, turned to a comic book approach for the acclaimed Haji Kamal scenario:

Extract from Haj Kamal
This scenario uses an eye-catching comic strip approach, achieved by converting photographs into illustrations. This extract is part of the scene setting.

Haj Kamal extract
Still using the comic strip approach, the learner is presented with a situation and a number of options for action.

Tools for developing branching scenarios
It is perfectly possible to build simple branching scenarios in PowerPoint and then convert to Flash using a tool that supports branching such as Articulate Presenter. General purpose desktop authoring tools, such as Adobe Captivate and Lectora, or online tools such as Rapid Intake’s Unison, have all the functionality you need. There is also talk of Articulate having a specialist scenario-building tool, called Storyline, in the pipeline for later in 2011.
Enjoy your story-telling.
A PDF version of this Practical Guide is now available.
Next up in the series is a Practical Guide to producing learning videos.

The need for formal learning

The new learning architectThroughout 2011 we will be publishing extracts from The New Learning Architect. We move on to the fifth part of chapter 4:
Formal learning
The goals of formal and non-formal learning are essentially the same – to equip employees with the fundamental knowledge and skills that they require to meet present and future job responsibilities. The difference is in the approach. The structure inherent in formal education, training and development – the objectives, the curricula, the assessment, the professional facilitation – provides advantages for employers and employees alike:

  • Employers can have greater confidence that important content has been covered consistently.
  • Employers can more easily track who has had what training and when.
  • Employers can have greater confidence that learning objectives have actually been achieved.
  • Employees can have greater confidence in the quality of the tuition they are likely to receive.
  • Employees are more likely to have access to professionally-designed materials.
  • Employees have the opportunity to gain a certification/qualification that will be valuable in their careers.

Coming next in chapter 4: The need for top-down learning
Return to Chapter 1 Chapter 2 Chapter 3
Obtain your copy of The New Learning Architect

A practical guide to creating learning scenarios: part 3

Practical guidesIn part 1 of this series, we looked at what a learning scenario is, its basic structure, capabilities and applications. In part 2 we saw how scenarios could be used to help learners to undertake principle-based tasks. In this third part we look in more detail at the steps involved in creating simple scenarios to help learners to practise rule-based tasks. Although scenarios are usually thought of as tools to support more complex problem-solving and decision-making, as we shall see, they can as easily be used as a technique for practising more routine, everyday tasks.

Rule-based tasks don't require you to make judgements, just to follow instructions

When we talk about ‘rule-based tasks’ we mean those activities that can be carried out repeatedly according to clearly laid-out instructions. The job holder is not required to make a judgement, just to follow the rules – if this … do that. In the developed world, it would be fair to say that less and less tasks are of this nature, because routine tasks that obey strict rules can often be undertaken by robots or computers, transferred off-shore where the labour is cheaper or just looked up from some reference source as and when needed. Having said that, everybody’s job involves some rule-based elements, and some tasks simply can’t be carried out by a machine or at a distance.

Step 1: Teach the rules

Principle-based scenarios are typically used as an element in a process of guided discovery. The  scenario brings out issues which can then be reflected upon and discussed, hopefully resulting in learner insights. A task-based scenario is much more likely to be used within an instructional strategy – you teach the rules, then have the learner practise applying them in realistic situations.
So, before building the scenario, be clear about what the steps are in the procedure you want to teach and the rules that need to be applied at each step. Then create some content to get all this across:

  • provide an overview of the task and why it is important
  • demonstrate each step, explaining the rules that need to be applied and why these are necessary

Don’t over-teach. The idea is to provide the minimum information necessary for learners to be able to have a go themselves. The detail can be filled in later, either as feedback within the practise scenarios or as further reading.

Step 2: Develop a storyline

You can then set about designing your scenarios. The idea is to provide the learner with the most realistic experience of the task that you can. For more difficult tasks, start with a simple initial practice that will allow the learner to build their confidence by applying the most basic rules. Then move on to provide more difficult scenarios that require the learner to apply more complex rules. Aim to provide enough opportunities for practice that any learner will be able to gain confidence in applying the rules to real tasks.
You will not always be able  to provide completely  authentic practice opportunities. Sometimes your scenarios will be just a first step to be followed up by more realistic practice away from the computer.

Step 3: Develop your script

As with principle-based scenarios, use whatever media are necessary to convey the storyline. Text and images will often suffice, but if you need a more realistic experience, you have the option of richer media – perhaps even 3D graphics.
As ever, your hardest job will be to develop suitable questions. Where possible, these should match the real-life experience, so if the real task requires someone to type a code into a form field on a computer, then have them do the same thing in your scenario.

If you can, make the interaction match the task. Here the learner is required to complete a form field as they would in a real software application.

If you plan to use multiple-choice questions, then make sure that all the options are plausible

Ideally every option should have its own feedback. This allows you to correct any misundertandings that might have led to an incorrect answer and to add little details that you might have held back from your initial demonstration.
The feedback you provide can be used to correct any misunderstandings and to add extra detail

Step 4: Test and revise

As early as you can, have some sample learners try out your scenarios. Find out from them whether the scenarios are sufficiently realistic, whether they understand clearly what they have to do, whether the questions are set at the right level of difficulty, and whether the feedback is helpful. Be prepared to make lots of refinements until you get it right.

Coming in part 4: creating more complex branching scenarios

The need for non-formal learning

The new learning architectThroughout 2011 we will be publishing extracts from The New Learning Architect. We move on to the fourth part of chapter 4:
More proactive approaches are needed because, however good our performance support environment, there are certain fundamental things we need to know and skills we need to have before we can make any serious attempt to function in our present jobs, or take on new responsibilities. We are, of course, recruited as much as anything, for the skills and knowledge we already possess – for our years of experience with other employers and for our qualifications. But every employer is different in terms of their culture, their particular policies and procedures, and the people that they employ. Even the most qualified new recruit requires some induction.
And jobs don’t remain static – responsibilities change along with new strategies, processes and systems, creating new requirements for knowledge and skill. And looking ahead, organisations and employees themselves have an obvious interest in making preparations for employees to take on greater responsibilities.
In addressing these needs, organisations can, of course, deliver formal interventions, typically packaged up as ‘courses’. However, they can also call upon a wide range of more flexible, non-formal approaches, which allow for continuous learning and development.
Coming next in chapter 4: The need for formal learning
Return to Chapter 1 Chapter 2 Chapter 3
Obtain your copy of The New Learning Architect
 

A practical guide to creating learning scenarios: part 2

Practical guidesIn part 1 of this series, we looked at what a learning scenario is, its basic structure, capabilities and applications. We move on now to look in more detail at the steps involved in creating simple scenarios to support learners in understanding the principles underlying everyday problem-solving and decision making. Scenarios are well suited to this type of learning problem, because they provide learners with the opportunity to experiment with different responses to the sorts of situations that they could encounter in their jobs and to gain insights into the dynamics which can determine success and failure.

Principle-based tasks require you to make judgements rather than simply follow rules

When we talk about ‘principle-based tasks’ we mean those jobs that cannot be accomplished by following simple rules – ‘if this happens then do that’. Principle-based tasks require you to make judgements on the basis of the particular situation you happen to be facing. They require you to understand cause and effect relationships, i.e. principles:

  • Projects with unclear objectives are more likely to fail.
  • Irritable behaviour can be caused by lack of sleep.
  • You’ll find it easier to cope if you don’t look at each email as soon as it comes in.
  • An impolite greeting will turn the customer against you before you’ve begun.

Principles such as these are relevant to just about any job you can imagine, although clearly some more than others. They are rarely black and white – in fact they are often the subject of differing opinion. Principle-based tasks, therefore, require a very different treatment and this is where scenarios come into their own.

Step 1: Decide what principles you want to bring out through the  scenario

A scenario needs a clear purpose – don’t use it just to lighten up what would otherwise be a boring piece of e-learning.  Be realistic about what you can achieve in one scenario. You may be able to tackle a simple principle with a single question, but often a whole series of questions will be required to bring out all the elements and to compare different perspectives. A lot depends on your learner. Novices will want to look at a single issue at a time, whereas more experienced practitioners may feel comfortable immersing themselves in a complex situation with all sorts of competing pressures. If in doubt, keep it short and simple.

Step 2: Develop a storyline

Your next task is to develop a storyline that will bring out the principles you have chosen to focus on. It is really important that this storyline is credible with your audience. They must be able to relate to the situation and the characters. If you are struggling for ideas, ask a sample of your potential learners to describe the situations they face in their own day-to-day work. As with TV drama, be careful not to base your plot too closely on a real-life incident in case you reveal the identity of the protagonists.
The problems that you set should be challenging yet achievable. Remember that what is challenging for a beginner may be completely obvious to an old hand, so adapt your scenario to your audience. With beginners, it’s a good idea to start with relatively straightforward and routine problems, and move gradually to the more complex cases in which right and wrong is not so easy to establish.

Step 3: Develop your script

Use whatever media are necessary to convey the storyline. More often than not text will do the trick, but some situations will be hard to get across without richer media.

You can use any media to describe the situation, but text and graphics will often suffice

This scenario is presented as a dialogue shown as a series of pictures with speech bubbles

Without doubt, your hardest job will be to develop plausible options for your questions. Every option should be tempting to at least a minority of your target audience. Throwaway options, which are clearly not going to work, will devalue the whole process.
Each of the options you present needs to be plausible, at least to a minority of your target audience

Assuming this is not a branching scenario (and we’ll be dealing with these later in the series), every option should have its own feedback. Writing this feedback will not be as simple as “Correct – well done” or “Sorry, incorrect.” Every answer deserves a considered response, weighing up all the pros and cons. If the feedback won’t fit on the same screen as the question, jump to a new screen where you have more room. Remember that this feedback will be the primary source of new learning, so it shouldn’t be wasted.
Again, assuming you are not creating a branching scenario, you should allow the learner to explore any and all of the options before moving on. A scenario is not an assessment, so don’t follow assessment rules.
Each option here has its own feedback, written to bring out the pros and cons of the learner's choice. Learners are free to select as many options as they like.

Step 4: Test and revise then do it again

You’ve probably got the message by now that a scenario needs to be authentic. The only way you will tell whether you’ve got this right is to try it out with typical learners. Bring them in early. Have them provide a verbal commentary to you as they attempt the questions. Act on their feedback and then test again. You are not admitting a mistake by changing your script – you are showing how much you want to make it work.

Coming in part 3: creating simple scenarios for rule-based tasks

The need for on-demand learning

The new learning architectThroughout 2011 we will be publishing extracts from The New Learning Architect. We move on to the third part of chapter 4:
On-demand learning is necessary because, in many jobs, it is impossible to know everything there is to know. And even if, through prolonged study and training, you were lucky enough to get to know it all, you’d soon find that most of it had changed. In the knowledge economy, it is more important to know where to look – or who to talk to – than it is to have the knowledge yourself.
According to market intelligence firm IDC, employees are, on average, losing seven hours per week searching, resolving queries and interrupting colleagues for assistance with procedures. The obvious solution, to provide some form of training, is simply not practical when the volume of information required to do your job effectively is too great or the information changes too rapidly. Formal training is arduous, disruptive and expensive and so best reserved for getting across the most critical concepts and principles, and the skills that employees use every day.
Increasingly, a better answer is to encourage learning at the point of need, when it is critical to an immediate challenge and when the employee’s motivation to learn is therefore at its greatest. As Samuel Johnson once said, “Knowledge is of two kinds: we know a subject ourselves or we know where we can find information upon it.”
Coming next in chapter 4: The need for non-formal learning
Return to Chapter 1 Chapter 2 Chapter 3
Obtain your copy of The New Learning Architect

A practical guide to creating learning scenarios: part 1

Practical guidesA learning scenario consists of a description of a realistic situation (usually fictional), accompanied by one or more questions that challenge the learner to respond to some aspect of that situation. At its simplest, a scenario could consist of a single description followed by a single question, but it could also develop in stages with one or more questions at each stage. In the case of a branching scenario, the information depicted at each stage will vary depending on the answers the learner made at previous stages.
The information that describes a scenario could be presented using a wide range of media elements, including text, images, animations, audio and video, in various potential combinations. What is more important than the media mix is that the situation described to the learner seems relevant and authentic.
Although, in theory, a variety of different question formats could be employed to challenge the learner about aspects of the situation, the most common and the most versatile is the simple multiple-choice question:

This simple scenario is presented as a short text statement with an accompanying picture. The learner then has three options from which to choose. Feedback is provided simply in text depending on the option selected.

Note that scenarios can be presented in the third person, as in the example above, where you are an observer to the situation, but they can also be delivered in the first person, with you as an active participant in the situation:

What would you do first?

Feedback plays a very important role in a learning scenario. This could be explicit and immediate, as in the example above. However, in a branching scenario, the feedback occurs implicitly, by what happens next – you learn by seeing the potential results of your decisions.
In this practical guide, we’ll be exploring scenarios in all of these forms.

Media elements

As we have seen, a scenario has three core components:

  1. A description of a situation
  2. A question with various options
  3. Feedback on the options selected or, in the case of a branching scenario, a jump to the next stage in the scenario

The first and third of these could be presented in a wide variety of forms:

  1. Simple text
  2. Text with one or more images
  3. Audio with images or animations
  4. Video

The question and options will normally be presented textually, to provide the learner with as much time as they need to reflect on their decision.

Interactive capability

A learning scenario is by nature interactive – a case study with questions built in. Although, in this Practical Guide, we are focusing on fully-interactive scenarios, it is worth mentioning that very similar results could be obtained by combining a more conventional case study with some means for collaboration, such as a forum, a blog or a classroom discussion.

Applications

Principle-based tasks: A learning scenario is most commonly used to help a learner gain insight into key principles that influence the problem-solving and decision making elements of their work. The focus here is on tasks that cannot always be accomplished through the application of a few simple rules – there is a need for critical judgement to be applied. In these cases, a strategy of guided discovery is usually applied. The scenario is positioned early in the solution, before the formal presentation of learning material. It provides a chance for the learner to experiment with different approaches and to reflect upon the possible outcomes.
Rule-based tasks: However, a scenario could also be used as a means for practising a simpler, rule-based task. Here the strategy is more likely to be instructional, with the scenario coming later in the solution, after the rules have been explained.

Scenario-building tools

Scenarios can be produced quite simply in tools such as PowerPoint, using hyperlinks to jump from slide to slide depending on the learner’s selections. Further functionality can be added by converting the slides into Flash, using tools such as Articulate or Adobe Presenter.

Scenario created in PowerPoint
This scenario was created using Microsoft PowerPoint

For maximum flexibility, use a fully-fledged e-learning authoring tool, such as Adobe Captivate or Lectora.

Coming in part 2: creating simple scenarios for principle-based tasks

The need for experiential learning

The new learning architectThroughout 2011 we will be publishing extracts from The New Learning Architect. We move on to the second part of chapter 4:
Experiential learning occurs whether we want it to or not, but there are good reasons why we should be supporting and encouraging it:

  • Because everyday work experience is rich with opportunities for learning.
  • Because we don’t always take the best advantage of these opportunities.
  • Because, if something goes well, we want to repeat it.
  • Because, if something goes wrong, we want to avoid it happening again.

Without experiential learning, all we are left with is the ‘doing’. We repeat the same actions over and over again, never improving and constantly at risk to every new threat that appears in our environment. Experiential learning is ‘doing’ plus an essential additional ingredient – reflection. Without reflection, we can have many years of experience and learn less than someone who is a relative newcomer but who has learned how to learn.
Coming next in chapter 4: The need for on-demand learning
Return to Chapter 1 Chapter 2 Chapter 3
Obtain your copy of The New Learning Architect
 

A contextual model for learning

The new learning architectThroughout 2011 we will be publishing extracts from The New Learning Architect. We move on to the first part of chapter 4:
Every context is a learning context, whether we are at work or play. We are born as learning machines and continue to learn until the day we die. We may not always be consciously learning, but learning is taking place whether we are aware of it or not, as we strive to make sense of and adapt to the circumstances in which we find ourselves.

Four contexts

Four contexts
In our working lives there are various contexts in which we can learn:
Experientially: Experiential learning is ‘learning from’ rather than ‘learning to’. It occurs consciously or unconsciously as we reflect upon our successes and failures at work and those of our acquaintances.
On-demand: On-demand learning, as with the others that follow, is a form of ‘learning to’. It occurs because we don’t know how to perform a particular task and need immediate help to acquire the necessary knowledge. On-demand learning can be regarded as synonymous with ‘just-in-time learning’ or ‘learning at the point of need’.
Non-formal: Non-formal learning is ‘learning to’ with a more relaxed timeframe. It occurs whenever we – or our employers – take deliberate steps in preparation for the tasks we will be expected to carry out in the medium to long-term future. This may cynically be referred to as ‘just-in-case’ learning, in contrast to learning that is ‘just-in-time’. Non-formal learning takes many shapes, but stops short of those interventions which are packaged up as formal courses.
Formally: Formal learning occurs through learning events or packages with clearly set-out learning objectives, pre-defined curricula, means for assessment and the award of some qualification or certificate of completion. Unless the course is entirely self-study, there will also be a designated teacher or trainer.

Two perspectives

Top-down and bottom-up
These categories are useful, but they don’t distinguish between the learning that is planned for and supported by our employer, through the efforts of the l&d department and others (top-down learning), and the learning that we carry out on our own initiative, in work or outside, using resources that we find for ourselves (bottom-up learning). So, experiential, on-demand, non-formal and formal learning can originate in two ways:
Top-down learning occurs because organisations want their employees to perform effectively and efficiently and appreciate that this depends, at least in part, on them possessing the appropriate knowledge and skills. Top-down learning is designed to fulfil the employer’s objectives, not the employees’.
Bottom-up learning occurs because employees also want to perform. The exact motivation may vary, from achieving job security to earning more money, gaining recognition or obtaining personal fulfilment, but the route to all these is performing well on the job, and employees know as well as their employers that this depends – again, at least in part – on them acquiring the appropriate knowledge and skills.
Coming next in chapter 4: The need for experiential learning
Return to Chapter 1 Chapter 2 Chapter 3
Obtain your copy of The New Learning Architect

A practical guide to creating learning screencasts: part 3 – using desktop tools

Practical guidesIn part 1 of this guide, we looked at the arguments for screencasting. In part 2, we examined how best to work with simple, online, all-in-one-take tools. In this final part, we check out the more fully-featured desktop screencasting tools.

Choose a tool

Desktop screencasting tools have been around for well over a decade. Over time, two tools have emerged as clear front-runners – Adobe Captivate and Techsmith Camtasia. However, other tools can definitely do the job, including the free Wink. There are also much higher-end performance support tools as well as applications designed specifically to support screencasting for ERM systems such as SAP and Siebel.

What you can do with these tools

Desktop tools will give you much greater functionality than online tools. Whether you need this functionality or not only you can decide. For example, Camtasia will allow you to:

  • Record a webcam stream alongside the screencast. This feature requires some care, because it could just create visual noise.
  • Edit your screencast just like a video.
  • Record narration quite separately from the recording of the software demo.
  • Not use an audio narration at all, focusing instead on the use of text labels and highlights.
  • Share your output in a wide variety of ways including CD-ROM, a YouTube-ready format, or as an MP4 video for Apple mobile devices.

Camtasia output
Camtasia allows you to output to a wide range of formats, especially video

Although you can add interactivity to Camtasia screencasts, including quizzes, the product is heavily orientated towards video as an output. In this respect, it differs quite noticeably from Captivate which, as well as allowing you to  add narration, labels, highlights or any combination of these, also permits you to achieve the following:

  • Have the learner interact with the simulated application (in Training Mode) rather than just watch and listen to your presentation (Demo Mode).
  • Assess how well the learner can carry out a software task on their own, without prompts (Assessment Mode).
  • Output to Flash (with SCORM wrappers if you’re deploying on an LMS).
  • Output to F4V (Flash video), or as as a handout in Word/PDF format (any of which will lose you your interactivity).

And, of course, Captivate is much more than a screencasting tool. It has all the functionality needed for creating general-purpose e-learning modules.

Captivate captions
Captivate can generate captions automatically, although these can always be edited later

Captivate feedback
Captivate also allows you to provide the user with feedback based on their interactions with the simulated software

Start with a plan

However impulsive you may be, it will save time in the long run to think through carefully what you are trying to achieve from your screencast:

  • If your screencast is going to be used for reference, then a demo is probably all you need (“show me”).
  • If you’re looking to build competence, then have the user interact with the simulated software (“try me”).
  • If you need to measure competence, then build in an assessment (“test me”).

Also consider the topic for your screencast. Don’t bother teaching functionality which is pretty obvious anyway – concentrate on those tasks which you know users are having trouble with. And rather than talking about the functionality in abstract, much better to tell a story, to demonstrate how the software is used to solve real world problems.
Reference information is best kept short and sweet. If you have four aspects of a system to describe, create four screencasts. If you really do need to build a more elaborate piece of content, then make sure you add a menu that enables users to get to the information they want without delay (but remember menus are of no use if you are exporting to video).

Scripting

The more elaborate your screencast becomes, particularly in terms of interactivity, the more you will benefit from designing it in detail before you commence production, and that is likely to include a script for the narration. As ever, the key to success here is making sure the narration comes over as natural and conversational. Much of that is in the writing (write for the spoken voice, not for the screen) and the editing (try reading it aloud and if this causes you any difficulty,  keep working on it), but delivery counts too. Not everyone will come over well as  a narrator. If, even with practice, you can’t deliver the script confidently and convincingly, ask someone else to help or, best of all, hire a professional.

Recording

With an online tool, you record the whole screencast in one take. If you make a mistake, you have to start again. With desktop tools, you are under much less pressure. You can record your demos piece by piece and assemble them together later. Mistakes can easily be edited out.
However, you still have to make some major decisions like the size of the capture window. Be mindful of the device and the software your audience will be using to view your screencast – if necessary focus in on a small area of the application.

Camtasia record options
Recording options in Camtasia

Captivate record dialog
The dialog for setting recording options in Captivate

Editing

Here’s where desktop tools come into their own. You’ll find that just about any aspect of your screencast can be changed to suit your requirements. You can supplement your recordings with titles, menus, captions, highlights, interactions and much more.

Editing in Camtasia
Camtasia provides much of the functionality of a full-blown video editor

Don’t rely on your own judgement. Test every aspect of your screencast out with colleagues or, better still, typical users, at each step in development. Don’t get precious about sticking to your original design – what matters here is that it works!
This guide is now also available as a PDF download
Take a look at our other practical guides
Coming next: A practical guide to creating learning scenarios